Customer Document Entry
Let's learn by example.
This tutorial will walk you through entering a customer for the first time. It will avoid any distractions that will draw you away from the goal at hand: hitting that "Save" button!
When you have finished this tutorial, you will have learned to:
- load the Customer Document List,
- create a New Customer,
- assign a primary address to the Customer,
- associate multiple Contacts with the Customer, and
- select a Primary Contact for the Customer.
There are three basic steps to creating a new customer:
- Prep: Load the Customer Document List
- Customer Entry: Create a New Customer
- Add Additional Informaton: Add Contacts and Addresses to the Customer
Prep
Step 1: Log In To Desk
Lot into Desk
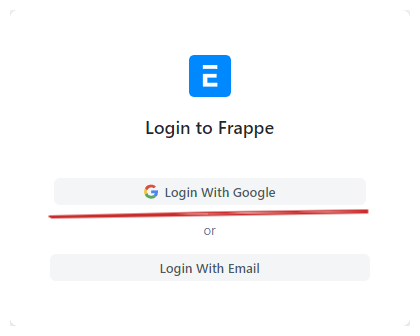
- Navigate to http://access.starstix.com and click "Login" in the upper-right corner of the screen.
- Underneath "Or login with", click the "Google" button.
- If you see a screen that says "New updates are available", just click "Close".
Success
Congratulations - you're in!
Step 2: Load the Customer Document List

- Click inside the Global Search box at the very top of the page and type "customer".
- Click on the "Customer List" option in the Global Search dropdown.
Success
You are now looking at the Customer Document List.
Customer Entry
Step 1: Create a New Customer Document
- Click on the blue "New" button in the upper-right corner of the screen. You will be presented with a Quick Entry Form. Click on on the "Edit in full page" button in the bottom-left of the form to be taken to the full-page form.
-
Use the values below to fill out the form:
-
In the top section:
Field Value Full Name Tim Test - Test's GarageType CompanyCustomer Group Commercial -
In the "MORE INFORMATION" section (click on the section title to expand the section):
Field Value Industry Service
-
-
Click the blue "Save" button in the upper-right above the form.
Success
The customer is now saved to the system, but you aren't done yet! We still don't have any contact or address information. Let's fix that now.
Step 2: Add a Primary Address to the Customer Document
- Scroll down to the "ADDRESS AND CONTACT" section and click "New Address". You will be taken to the new Address form.
-
Use the values below to fill out the form:
-
In the top section:
Field Value Address Type CurrentAddress Line 1 1891 Goodyear AveAddress Line 2 Ste 618City/Town VenturaState CAPostal Code 93003Email Address support@ebs.llcPhone 805-650-5278Fax 805-642-7673Preferred Billing Address Preferred Shipping Address
-
-
Click the blue "Save" button in the upper-right above the form. You will be taken back to the Customer Document. If not, simply click the "Save" button a second time. The new address will appear in the "ADDRESS AND CONTACT" section.
- Under the "PRIMARY ADDRESS AND CONTACT DETAIL" section, click in the "Customer Primary Address" field. You will see a dropdown with one entry - the address you just created. Select it - you will see the "Primary Address" field beneath filled out with the new address.
- Click the blue "Save" button in the upper-right above the form.
Success
You now just associated a new Address with the Customer, and selected it as the primary address.
Step 3: Add a Primary Contact to the Customer Document
- Scroll down to the "ADDRESS AND CONTACT" section and click "New Contact". You will be taken to the new contact form.
-
Use the values below to fill out the form:
-
In the top section:
Field Value First Name TimLast Name TestCompany Name Test's Garage -
In the "CONTACT DETAILS" section, under "Email IDs" (click "Add Row" for each email address):
Email ID Is Primary ttest@ebs.llcsupport@ebs.llc -
In the "CONTACT DETAILS" section, under "Contact Numbers" (click "Add Row" for each contact number):
Number Is Primary Phone Is Primary Mobile 805-650-5278 805-395-4938 805-650-6121
-
-
Click the blue "Save" button in the upper-right above the form. You will be taken back to the Customer Document. If not, simply click the "Save" button a second time. The new contact will appear in the "ADDRESS AND CONTACT" section.
- Under the "PRIMARY ADDRESS AND CONTACT DETAIL" section, click in the "Customer Primary Contact" field. You will see a dropdown with one entry - the Contact you just created. Select it. You will see the "Mobile No" and "Email Id" fields beneat filled out with the contact information.
- Click the blue "Save" button in the upper-right above the form.
Success
You now just associated a new primary Contact with the Customer.
Step 4: Add a Secondary Contact tothe Customer Document
- Scroll down to the "ADDRESS AND CONTACT" section and click "New Contact". You will be taken to the new contact form.
-
Use the values below to fill out the form:
-
In the top section:
Field Value First Name TiffanyLast Name TestCompany Name Joe's Garage -
In the "CONTACT DETAILS" section, under "Email IDs" (click "Add Row" for each email address):
Email ID Is Primary ttest2@ebs.llc
-
-
Click the blue "Save" button in the upper-right above the form. You will be taken back to the Customer Document. If not, simply click the "Save" button a second time. The new contact will appearin the "ADDRESS AND CONTACT" section.
Success
That's it - you're done!
Summary and More Information
This tutorial has guided you through:
- loading the Customer Document List,
- creating a New Customer,
- assigning a primary address to the Customer,
- associating multiple Contacts with the Customer, and
- selecting a Primary Contact for the Customer.
Detailed Instructions
For additional instructions on field usage and other details, as well as detailed instructions for entering new Customers, visit Entering Customers in the How-To Guides menu.