All About Notifications
Note
This how-to will be in a slightly different format than other how-tos, since it does not have filling out forms as it's subject.
Important
ERPNext only has a few built-in notifications. They are always delivered via system notifications (i.e. the notification bell). Built-in notifications can also be sent as emails. They cover the following events:
- @mentions,
- assigments,
- document shares, and
- energy points.
The Notification Bell
System notifications are provided by the bell next to your profile icon. When you receive a notification, the bell will display a red dot.


The notification panel can be opened by clicking on the notification bell. It consists of two sections: "Notifications" and "Today's Events".
The Notification Panel
You can use the Notifications section of the notification panel to manage notifications and events in ERPNext:


Managing Built-in Notifications
 If you would like to turn off email notifications for specific built-in
notifications, you can do so by clicking on the settings icon in the
notifications panel.
If you would like to turn off email notifications for specific built-in
notifications, you can do so by clicking on the settings icon in the
notifications panel.
Notice
You can ignore the first section of the notification settings form, since was designed for deprecated functionality.
 Under Email Settings, deselect "Enable Email Notifications" if you would
like to turn off all email notifications for the built-in notification
types.
Under Email Settings, deselect "Enable Email Notifications" if you would
like to turn off all email notifications for the built-in notification
types.
If you don't want to turn off email notifications for for all of the notification types, deselect only the types you want to disable email notifications for.
Custom Notifications
Custom notifications are configured via the Notification DocType. Each Document contains the configuration values for a notification. Custom notifications can be triggered in a variety of ways. A couple examples include:
- Saving a new/existing Document.
- Submitting a Document.
- Days after the creation/modified date.
- Days before/after a date in a Document field.
- On changing the value is a Document field.
You can also make a simple modification to a document upon sending the notification, and a printed version of the document may be attached.
Custom Notification Channels
Notifications may be sent via a number of different channels, and new channels can also be created to handle notifications. The built-in notification channels are:
- Slack
- System Notification
- SMS
How to Set Up a New Notification
- Fill out the form as described below, ignoring any sections or fields that are not listed.
- Click the blue "Save" button in the upper-right corner above the form. The page will refresh with the new Notification Document will load.
Notification Form
Top Section
- Name*
- Fill this field out with the name of the notification.
- Chanel*
- Select the channel you want the notifications to use.

Filters Section
- Subject*
- Enter the subject of the notification. You can use jinja tags to
indicate document fields, like so:
New Document Created: {{ doc.name }} - Document Type*
- Select the DocType you want the notification to trigger on.
- Send Alert On*
- Select trigger that will cause this notification to be evaluated and sent. You can make further refinements to the notification trigger in the next section.
- Sender
- Select the Email Account you want to send the notification (only displays if "Email" is selected as the Channel).
- Send System Notification
- Select this checkbox if you want the notifications to trigger a system notification.

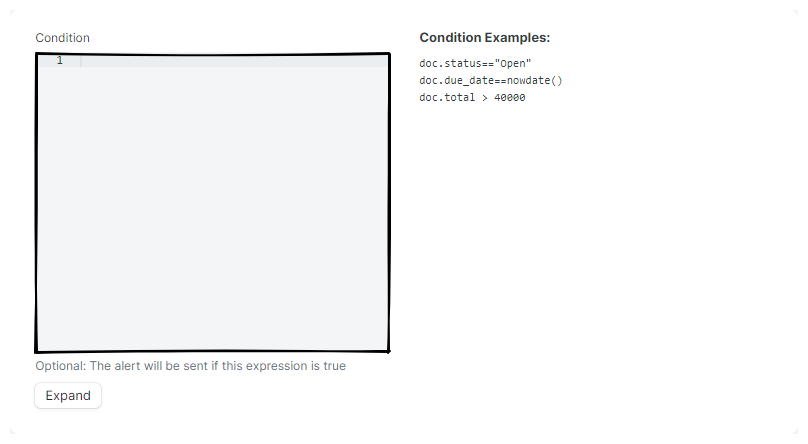
Condition Section
Tip
Field names can be discovered by using Customize Form, which can be accessed in the Message section. WARNING: Never save changes made through customize!
- Condition
- Enter any conditions you want to use to refine when the notification
triggers. For example, to refine a trigger so that it only triggers
if the
due_datefield is today and the document'sstatusfield is set to "Open", use the following condition:doc.due_date==nowdate() doc.status=="Open"
Set Property After Alert Section
Use this section If you want to make a static change to a field in the document after the alert is sent.
- Set Property After Alert
- Select the field you want to update.
- Value To Be Set
- Enter the value to change the field to. Note that this is a static value - be sure to test!.

Recipients Section
- Send To All Assignees
- Select this checkbox to send the notification to all assignees of the Document.
- Recipients
-
Use this field to send the notification to a recipient by a document field or by role. Additional conditions can be set to qualify a recipient before sending the notification.
- Receiver By Document Field
- Select the field containing the contact information you want to send to.
- Receiver By Role
- Select the role you want to send the notification to. All users of that role will receive the notification.
- CC
-
Enter email addresses you would like to CC the notification to.
- Edit the row to see this field.
- Hidden unless "Channel" is set to "Email".
- BCC
-
Enter email addresses you would like to BCC the notification to.
- Edit the row to see this field.
- Hidden unless "Channel" is set to "Email".
Tip
Field names can be discovered by using Customize Form, which can be accessed in the Message section. WARNING: Never save changes made through customize!
- Condition
- Enter additional conditions to limit when this notification triggers to this recipient.


Message Section
Tip
Field names can be discovered by using Customize Form, which can be accessed in the Message section. WARNING: Never save changes made through customize!
- Message
- Enter the message body of the notification using the example provided as a template.

Print Settings Section
- Attach Print
- Select this box if you would like a printout of the document attached to the notification.
- Print Format
-
Select the print format you would like to use in the notification.
Hidden unless "Attach Print" is selected
